

Jello Pudding Pops are a classic frozen dessert made by combining instant pudding with milk, then freezing the mixture in popsicle molds. These cool, creamy treats were wildly popular in the 1980s and are still loved for their rich texture and nostalgic flavor. They’re incredibly easy to make at home and require no baking or cooking, which makes them perfect for busy households or summer days when you want to avoid heating up the kitchen.
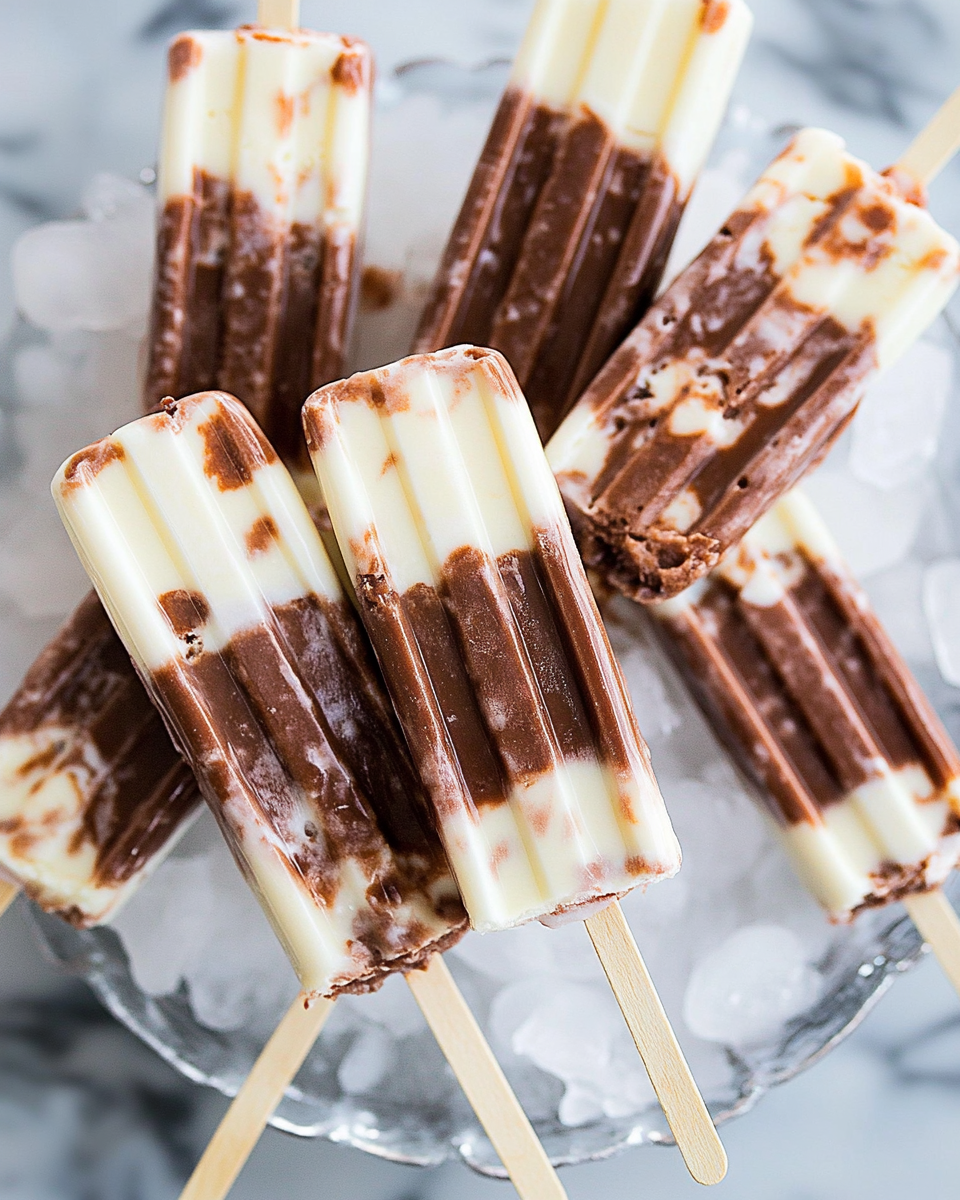
This version swirls together chocolate and white chocolate pudding, creating a visually appealing dessert with balanced flavor in every bite. It’s a great recipe to make with kids or for parties where you want a simple yet impressive treat.
Why You’ll Love This Recipe
- No-bake dessert that’s ready in minutes, not hours.
- Rich, creamy, and refreshing—the ultimate frozen comfort food.
- Nostalgic and fun for both kids and adults.
- Simple ingredients with minimal prep work.
- Easily customizable with various pudding flavors or toppings.
Whether you’re throwing a summer party or just craving a quick sweet fix, these Jello Pudding Pops deliver on taste, texture, and ease.
Preparation Phase and Tools to Use
Essential Tools and Equipment
- Two medium mixing bowls
- Whisk
- Measuring cups
- Gallon-size zip-top bag
- Popsicle molds (or small paper cups and wooden sticks)
- Scissors or kitchen shears
- Freezer
Importance of Each Tool
- Mixing bowls keep the chocolate and white chocolate layers separate for swirling.
- Whisk ensures a lump-free, smooth pudding mixture.
- Zip-top bag serves as a makeshift piping bag, making it easier to layer and swirl.
- Popsicle molds create the ideal shape and help evenly freeze the pudding.
- Freezer is, of course, essential for setting the pops completely.
Preparation Tips
- Use whole milk for the creamiest texture. Lower-fat options may result in icier pops.
- Chill the molds before filling to help the pudding set faster.
- If you’re using paper cups, wait until the mixture is partially frozen before inserting sticks.
Ingredients
For the White Chocolate Layer
- 1 (3.3 oz) box White Chocolate Instant Jell-O Pudding Mix (or substitute vanilla)
- 1¾ cups whole milk
For the Chocolate Layer
- 1 (3.3 oz) box Chocolate Instant Jell-O Pudding Mix
- 1¾ cups whole milk
Step-by-Step Directions
- Prepare the White Chocolate Pudding
In a medium bowl, combine the white chocolate pudding mix with 1¾ cups of milk. Whisk for about 2 minutes until smooth and thickened slightly. Let it sit for 5 to 10 minutes. - Prepare the Chocolate Pudding
In a separate bowl, whisk together the chocolate pudding mix and the remaining 1¾ cups of milk. Whisk until smooth and let it sit to thicken just like the first bowl. - Layer the Pudding
Spoon alternating scoops of each pudding into a large gallon-size zip-top bag. Press the air out, seal the bag, and gently squeeze to mix the flavors slightly without fully blending. - Fill the Popsicle Molds
Snip off one bottom corner of the zip-top bag with scissors. Pipe the mixture into the molds, allowing the two colors to swirl naturally as you go. Tap the molds lightly on the counter to remove any air bubbles. - Freeze
Place the filled molds in the freezer and freeze for at least 3 hours, or ideally overnight for the firmest pops. - Unmold and Serve
To release the pudding pops, briefly dip the mold bottoms in warm water for about 10–15 seconds. Gently pull the sticks to slide the pops out.
Tips and Variations
- Use vanilla pudding if white chocolate isn’t available.
- Add mini chocolate chips or crushed cookies before freezing for texture.
- Stir a spoonful of whipped topping into each mix for extra creaminess.
- Try other instant pudding flavors like banana, butterscotch, or pistachio for variety.
Serving Suggestions for Jello Pudding Pops
These Jello Pudding Pops are best enjoyed fresh from the freezer, served straight out of the mold for a cool, creamy treat. Their smooth texture and rich flavor make them ideal on their own, but you can easily elevate the experience with creative toppings or complementary pairings.
Fun Ways to Serve
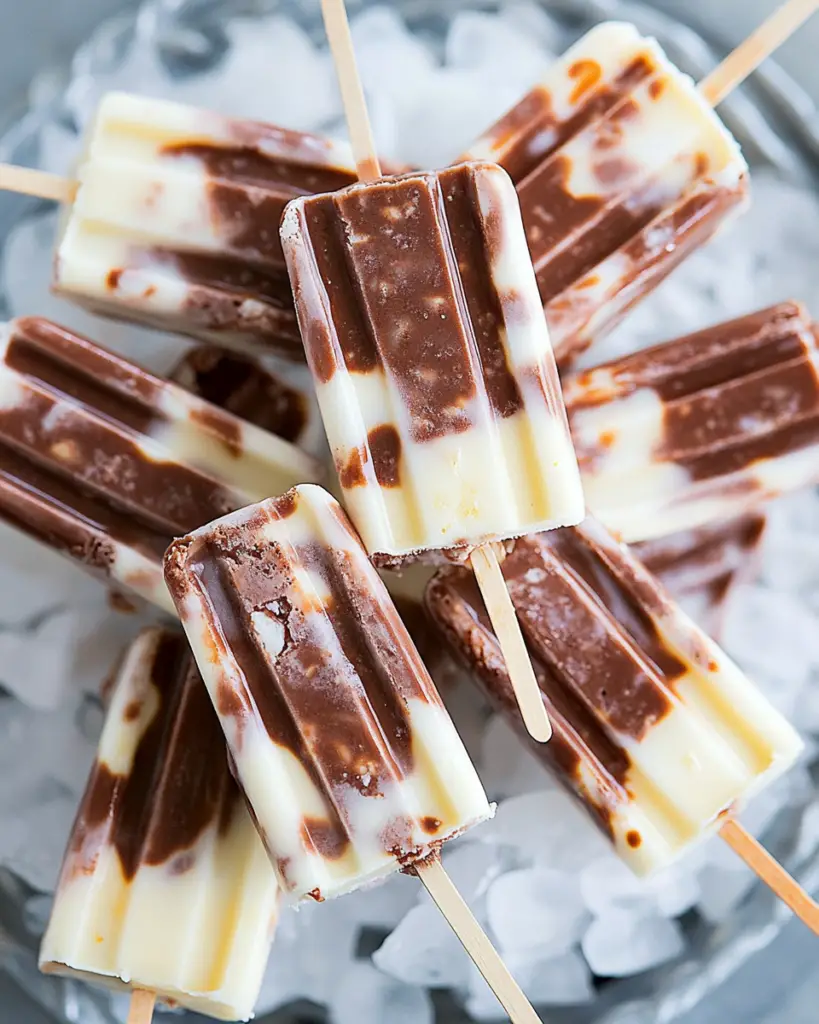
- Classic Style: Serve the pops as-is, right from the mold. Their swirled appearance and rich flavor stand on their own.
- With Toppings: After unmolding, dip the ends in melted chocolate and roll in crushed cookies, sprinkles, or chopped nuts before refreezing for five minutes.
- As Dessert Platters: Present a variety of pudding pop flavors—chocolate, vanilla, butterscotch—for a fun dessert board.
- Frozen Pop Bar: Set up a DIY frozen dessert station where guests can pick toppings and sauces to personalize their pop.
- With Dips: Offer a small bowl of chocolate sauce, peanut butter, or caramel for dipping.
Their versatility makes these pudding pops perfect for children’s parties, summer BBQs, or casual weeknight desserts.

Common Mistakes to Avoid and How to Perfect the Recipe
Even with a simple recipe like Jello Pudding Pops, small errors can impact the final result. Below are the most frequent pitfalls and how to prevent them.
Mistake 1: Using Low-Fat or Plant-Based Milk
Instant pudding mix is designed to set properly with whole dairy milk. Using skim, almond, oat, or soy milk may result in a runny mixture that doesn’t freeze well. For the creamiest pops, always use whole milk.
Mistake 2: Not Letting the Pudding Thicken
Skipping the resting time after whisking the pudding leads to a thin mixture that doesn’t hold its shape when piped into molds. Let each pudding mix thicken for 5 to 10 minutes before assembling.
Mistake 3: Overmixing the Pudding Swirl
Swirling the pudding too much in the bag can cause the two flavors to blend completely, eliminating the visual contrast. Aim for a loose swirl—don’t fully combine the two mixes before piping.
Mistake 4: Not Tapping the Molds
Air bubbles can form in the molds during filling. Tapping them gently on the counter helps remove trapped air and allows the mixture to settle evenly, resulting in smooth, bubble-free pops.
Mistake 5: Improper Mold Release
Forcing the pops out without loosening them first can break them or leave chunks behind. Always dip the molds briefly in warm water to loosen the pops before gently pulling.
Side Dish Recommendations
While Jello Pudding Pops are sweet and creamy on their own, they pair well with light, fruity, or refreshing side dishes—especially when served as part of a summer gathering or dessert buffet.
Here are eight side dish ideas that complement these frozen treats beautifully:
- Fresh Fruit Salad
A mix of berries, grapes, and citrus provides a light, juicy contrast to the dense pudding pops. - Mini Cheesecake Bites
Creamy and rich, these small bites add a sophisticated touch to your dessert spread without overpowering the pops. - Lemon Bars
The tartness of lemon cuts through the sweetness of the pudding, creating a perfectly balanced dessert combo. - Grilled Pineapple Skewers
Warm, caramelized fruit contrasts the cold creaminess of the pops while adding a tropical flair. - Watermelon Feta Salad
Slightly savory, refreshing, and hydrating, this salad offers a break from sugary treats while still being light. - Berry Yogurt Parfaits
Layers of fruit, yogurt, and granola provide a textural and nutritional counterpoint to the frozen pops. - Homemade Granola Bites
Chewy and nutty, granola bites bring in crunch and can be served as a handheld side with popsicles at outdoor gatherings. - Iced Mint Lemonade
A refreshing drink that cleanses the palate and complements the cool, sweet flavor of the pudding pops.
These options help build a more complete dessert experience while maintaining a refreshing, seasonal vibe. They also give you the opportunity to create a well-rounded, visually appealing dessert table.
Expert Tips to Make the Best Jello Pudding Pops
Getting the most out of your pudding pops isn’t just about mixing and freezing. Small adjustments and smart techniques can elevate the texture, presentation, and flavor.
Use High-Fat Milk
Whole milk is essential for the right consistency. It helps the pudding set correctly and gives the pops their signature creamy texture. Skim or low-fat alternatives result in icy or soft pops that don’t hold up well.
Chill the Molds Before Filling
Place your molds in the freezer for 15 to 30 minutes before filling. This helps the pudding start to set immediately, improving both texture and firmness.
Create Clean Swirls
To achieve the signature swirl effect, add alternating scoops of each pudding flavor into your zip-top bag, but avoid overmixing. As you pipe the mixture into the molds, use a slow and steady motion for even distribution.
Don’t Rush the Freezing
Although pudding sets quickly in the fridge, freezing takes time. Let the pops freeze for at least 3 hours, but overnight is best to achieve a fully set, scoopable consistency.
Label Your Flavors
If you’re making multiple flavors or batches, label your zip-top bags and molds before placing them in the freezer. This helps keep things organized and avoids confusion, especially if you’re preparing ahead for a party.
Storage and Reheating Instructions
Freezer Storage
Once frozen solid, the pudding pops can be left in their molds or unmolded and stored in a freezer-safe container. If storing outside of the molds, wrap each pop in wax paper or plastic wrap to prevent sticking and freezer burn.
- Best eaten within two weeks for optimal flavor and texture.
- Can last up to one month if sealed properly, but flavor may start to fade.
Reheating
No reheating is required. These treats are served frozen and meant to be enjoyed as they are. However, for younger children or sensitive teeth, you can let the pop sit at room temperature for 1 to 2 minutes to soften slightly.

Frequently Asked Questions About Jello Pudding Pops
Can I use almond, soy, or oat milk instead of dairy?
Most instant pudding mixes require dairy milk to thicken properly. Plant-based milks typically do not contain enough fat or proteins to allow the pudding to set. For best results, stick with whole milk.
Do I need to cook the pudding?
No. This recipe uses instant pudding, which sets without heat. Simply mix with cold milk and let it rest before freezing. There is no need to cook or chill before assembling.
Can I use sugar-free pudding?
Yes, sugar-free instant pudding can be used. However, it may freeze with a slightly different texture. Make sure to still use whole milk for creaminess.
How long do pudding pops take to freeze?
At a minimum, they need 3 hours. For best results and the firmest texture, freeze overnight. This also makes it easier to unmold without breakage.
How do I release pudding pops from the molds?
Run warm (not hot) water over the outside of the mold for 10 to 15 seconds. Gently pull the stick until the pop slides free. Avoid twisting or yanking, which can cause the pop to break.
Can I make different flavors?
Absolutely. You can mix and match flavors like butterscotch, banana cream, pistachio, or even cookies and cream. You can also add extras like crushed cookies, candy pieces, or flavored syrups.
Conclusion
Jello Pudding Pops are more than just a frozen treat—they’re a throwback to a simpler time and a testament to how easy homemade desserts can be. With only three ingredients, no baking, and less than 15 minutes of active prep time, they’re ideal for busy households, summer parties, or spontaneous cravings.
Whether you stick to classic chocolate and white chocolate or experiment with new flavors and textures, these pops offer endless possibilities. With proper storage, a few clever tips, and attention to detail, you can recreate this nostalgic dessert with modern ease and crowd-pleasing results.
Their creamy texture, customizable flavor options, and no-bake nature make Jello Pudding Pops a must-try addition to your homemade dessert rotation. Make them once, and they’ll become a repeat favorite every summer.
Let me know if you’d like me to compile the full post into a single markdown file for uploading to WordPress, or if you’d like internal links and schema markup included.
Jello Pudding Pops
Ingredients
- 1 3.3 oz box White Chocolate Instant Jell-O Pudding Mix (or vanilla)
- 1 3.3 oz box Chocolate Instant Jell-O Pudding Mix
- 3½ cups whole milk divided
Instructions
- In a medium bowl, whisk together the white chocolate pudding mix and 1¾ cups of milk until smooth. Let it sit to thicken slightly.
- In another medium bowl, whisk the chocolate pudding mix with the remaining 1¾ cups of milk. Let it thicken slightly as well.
- Once both pudding mixtures are beginning to set, spoon alternating scoops of each into a gallon-size zip-top bag. Seal the bag and snip off one corner.
- Pipe the pudding into popsicle molds, swirling the two flavors together as you go.
- Freeze for at least 3 hours, or overnight for best texture.
- To release the pudding pops, dip the molds briefly in hot water to loosen them, then gently slide out.
Leave a Comment